
Preparation
Step 1: Preparing the Creamy Pudding
In a large, deep bowl, carefully combine the two packets of instant vanilla pudding mix with the three cups of cold milk. Whisk vigorously for approximately two minutes until you obtain a thick, creamy, and completely smooth texture, ensuring that no lumps of undissolved powder remain. Once this perfect consistency is achieved, gently fold in the whipped cream using soft, circular motions to maintain aeration and achieve a light yet consistent mixture.
Step 2: Building the Structural Layers
In a 23 x 33 cm rectangular baking dish, meticulously place the first layer of graham crackers, completely covering the base and ensuring there are no gaps between the crackers. Evenly distribute half of the pudding mixture over this first layer of crackers, carefully spreading it with a spatula to create a smooth, even surface.
Step 3: Continuing the Layering Assembly.
Place a second layer of graham crackers on top of the first layer of pudding, maintaining the same attention to detail to achieve a complete and even covering. Pour and spread the remaining pudding mixture over this second layer of crackers, again using smooth movements to maintain the integrity of the layers already built.
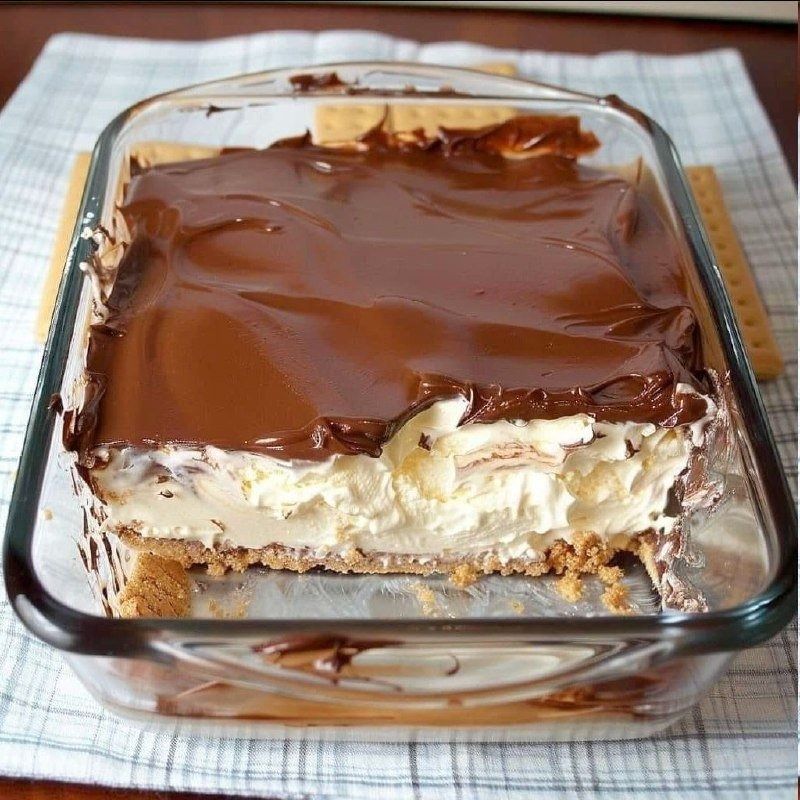
Step 4: Finishing with the final layer
Complete the dessert structure by placing the last layer of graham crackers on top of the second pudding layer, pressing lightly to ensure adhesion but without over-compressing the delicate structure that has been built. This top layer will serve as the base for the chocolate glaze.
Step 5: Applying the Chocolate Glaze
Carefully remove the lid and any foil from the container of chocolate glaze. Heat the glaze in the microwave for 30 seconds, checking the consistency and heating in additional 15-second intervals if necessary, until it reaches a liquid consistency but not so hot that it could melt the layers below. Spread the glaze evenly over the last layer of cookies, using a spatula to create a smooth, shiny surface.
Step 6: Cooling and Resting Process.
Completely cover the dish with plastic wrap, ensuring the plastic doesn't touch the surface of the frosting to maintain its perfect finish. Refrigerate the dessert for a minimum of four hours, although overnight cooling is highly recommended to allow the cookies to soften gradually and all the flavors to meld harmoniously, creating that characteristic texture that makes this dessert a unique experience.
Variations
: Double Chocolate Version.
Incorporate an additional layer using instant chocolate pudding, alternating with the vanilla pudding layers. This creates an attractive visual contrast and a more intense taste experience for chocolate lovers. This variation adds depth to the flavor profile and creates an even more indulgent dessert.
Variation with fresh fruit:
Add layers of sliced fresh strawberries or raspberries between the pudding layers to incorporate natural freshness and acidity that balances the dessert's sweetness. This version adds color, texture, and a nutritious element, making the dessert lighter and more refreshing.
Coffee Version:
Substitute a portion of the milk with strong cold brew coffee to create a mocha-flavored variation that pairs perfectly with the chocolate. This modification transforms the dessert into a more sophisticated experience, ideal for adult palates that appreciate the classic combination of coffee and chocolate.
Gluten-free option
: Use gluten-free cookies as a base, keeping all other proportions and techniques the same. This adaptation allows people with gluten sensitivity to enjoy this delicious dessert without compromising on flavor or characteristic texture.
Cooking Tips:
To achieve the perfect pudding consistency, it's essential to use very cold milk and whisk vigorously for the specified time. If the pudding doesn't thicken properly, it may be because the milk wasn't cold enough or it wasn't whisked enough. In this case, refrigerate the mixture for an additional 10 minutes and whisk again.
The temperature of the chocolate glaze is crucial for a professional finish. If the glaze is too hot, it can melt the whipped cream in the layers below; if it's too cold, it won't spread evenly. The ideal consistency should be similar to a thick, smooth-flowing sauce.
When placing the graham crackers, make sure they are snug without overlapping. If necessary, you can break some crackers to fill small gaps, always maintaining an even surface that will properly support the top layers.
Serving Suggestions:
Serve this no-bake chocolate éclair chilled, slicing it into even squares using a sharp knife that should be wiped clean between each cut to maintain crisp lines and a neat presentation. Accompany each slice with a dollop of fresh whipped cream or a small scoop of vanilla ice cream to create an additional contrast in temperature and texture.
For special presentations, decorate each individual portion with chocolate shavings, fresh raspberries, or a dusting of sifted cocoa powder. These simple decorations significantly enhance the dessert's visual appeal and add flavor and texture elements that complement the dining experience.
This dessert is ideal for family gatherings, casual celebrations, or as a weekend treat, since its advance preparation makes it a practical option that frees up time on the day of serving. Its refreshing nature makes it particularly suitable for warm weather or as the finale to a hearty meal.